Create an endpoint in workspace settings, then attach it to an upload page to receive signed submission events at your server.
What webhooks do
When a submission is ready for downstream automation, PigeonFiles sends an HTTP POST request to your endpoint with a JSON payload describing the event.
Webhooks let your team connect file intake to internal systems, custom dashboards, or processing pipelines without polling the API.
Steps
-
Open Integrations. In your PigeonFiles workspace, go to Settings > Integrations.
-
Find the Webhooks section. Scroll to the Webhooks card.
-
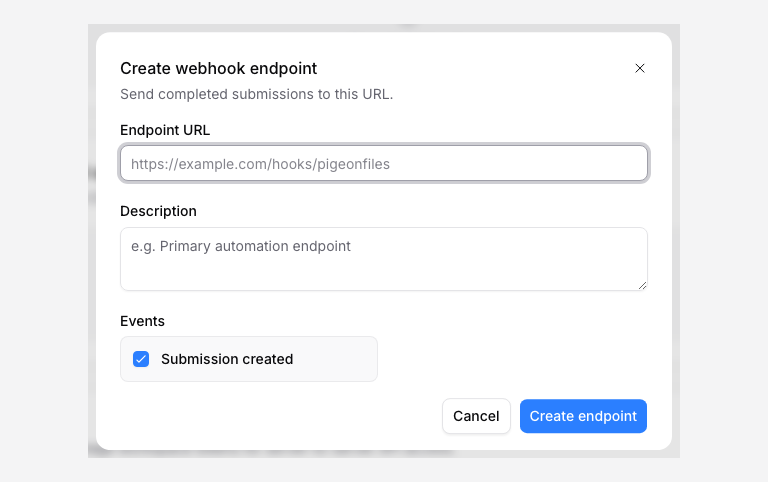
Create the endpoint. Click Create endpoint.
-
Enter the endpoint URL. Paste your server's HTTPS URL in the Endpoint URL field. PigeonFiles sends POST requests to this URL when matching events happen.
-
Add a description (optional). Use the Description field to note what this endpoint does, like "CRM intake sync" or "Document processing queue."
-
Keep Submission created selected. The current supported event is
submission.created, sent when the submission is ready for downstream automation. Failed-upload and connection-health events are not currently selectable. -
Choose page associations separately if needed. Endpoint creation does not include an upload-page filter. To attach an endpoint to a page, open that page’s Automation > Webhooks settings. Review the selected pages before testing.
-
Save the endpoint. Click Create endpoint.
-
Copy the signing secret. PigeonFiles shows the signing secret once. Copy it and store it securely, you will use it to verify webhook signatures. The secret will not be shown again after you close this dialog.
Test the endpoint
After creating the endpoint, click Send test event to send a sample payload to your URL. Check that your server received the request and responded with a 2xx status code.
If the test fails, check your endpoint URL, server logs, and firewall rules.
Manage endpoints
Enable or disable. Use Pause endpoint to stop delivery without deleting the endpoint. Use Activate endpoint to resume.
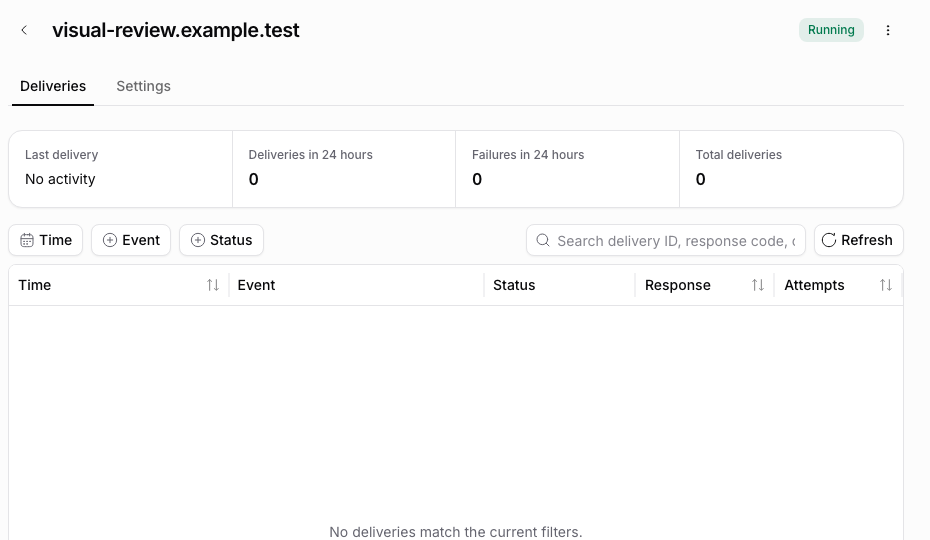
Delivery status. Each endpoint shows its current status and latest delivery result. Statuses include Enabled, Disabled, Queued, Retrying, Delivered, and Failed. Recent deliveries show the attempt count.
Rotate the signing secret. If a signing secret is compromised, click Rotate signing secret. Copy the new secret immediately, it will not be shown again. Update your server to verify with the new secret.
Delete an endpoint. Click Delete endpoint to permanently remove it. Delivery stops for that endpoint after deletion.
Troubleshooting
Deliveries show "Retrying." Your server returned a non-2xx response or the request timed out. Check your server logs and confirm the endpoint is accessible.
No deliveries appearing. Verify the endpoint is enabled, the event types match the events your upload pages produce, and the endpoint is associated with the upload page you expect.
Endpoint URL rejected. PigeonFiles requires HTTPS endpoints. HTTP URLs are not accepted.
Next steps
- Verify webhook signatures, validate that webhook requests come from PigeonFiles.
- Create API token, access submission data through the API.
- Automations and integrations.
Frequently asked questions
Do webhook payloads include the actual uploaded files?
No. Webhook payloads include submission metadata, field answers, file details (name, size, type, destination path), and delivery status. The files themselves go to your connected storage. Use the file links in the payload to access them.
What happens if my endpoint is down?
PigeonFiles retries failed deliveries. You can see delivery status and attempt count for each endpoint in Settings > Integrations. Design your endpoint to handle duplicate deliveries safely.
Where do I select upload pages?
Create the endpoint in Settings > Integrations, then open an upload page’s Automation > Webhooks section to manage its endpoint associations.