On Agency, an owner or admin can connect a hostname such as uploads.example.com under Settings > Advanced. You need access to that domain’s DNS settings. An upload domain and an email sender domain have separate setup flows.
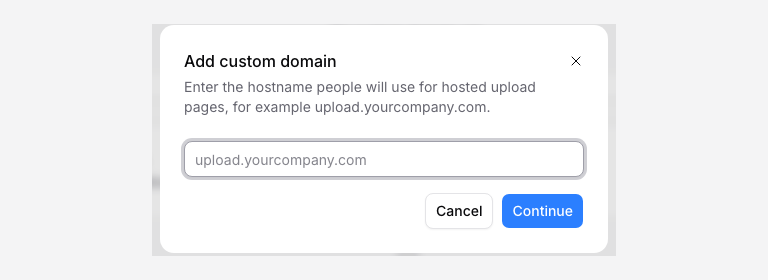
Connect the hostname
- Open the correct workspace, then Settings > Advanced.
- Under custom domain, click Add domain.
- Enter the hostname you want uploaders to use and continue.
- Copy the DNS record shown by PigeonFiles into your DNS provider. Use the exact type, name, and target from the app.
- Wait for the DNS change, then check verification again in PigeonFiles.
- After verification, open Share on an enabled page and test its generated link.
Use a dedicated subdomain rather than replacing the records that serve your main website. The workspace supports one configured upload hostname; check the impact on existing links before replacing it.
If verification does not finish
Compare the record name and target with the app. DNS providers differ in whether they expect a short name or a full hostname. Check for a conflicting record at the same name and allow time for DNS caches to update. Do not add a guessed target or a record copied from another workspace.
If the domain verifies but a page does not open, check that page’s availability and copy its current Share link. A custom domain does not enable a disabled page or remove its password.
Before removing a domain or moving DNS, update the links and QR codes you distributed. Ask support for help if you cannot identify which workspace owns a hostname.