Keep a Google Sheets intake log with client details, received time, and file links. Your team can filter and review the log without opening each submission in PigeonFiles.
What the log includes
Each row captures the data from one submission (or one file, depending on the mode you choose):
- Client name and email
- Field answers (document type, project, notes, etc.)
- Submission timestamp
- File names and file links
- Delivery status
Your team can use the spreadsheet as an intake tracker, a document checklist, or a reporting sheet.
Sheets logs submission data and file links. The actual files stay in your connected storage, Google Drive, Dropbox, or OneDrive.
Steps
1. Create or open your upload page
You need an upload page with at least one field that identifies the client, a name, email, or company field. If you do not have one yet, create a page and add the fields your team needs.
2. Check your fields
Make sure the page collects the information you want to see in each row. Common fields for a client intake log:
- Client / Company name
- Document type (select field keeps values consistent)
- Notes
The more structured the fields, the easier the spreadsheet is to filter and report on.
3. Open Settings > Automation
In the upload page settings, go to the Automation section.
4. Choose Google Sheets
Select Google Sheets as the automation type.
5. Connect Google if needed
If your Google account is not connected yet, authorize PigeonFiles to create and write to spreadsheets in your Google Drive.
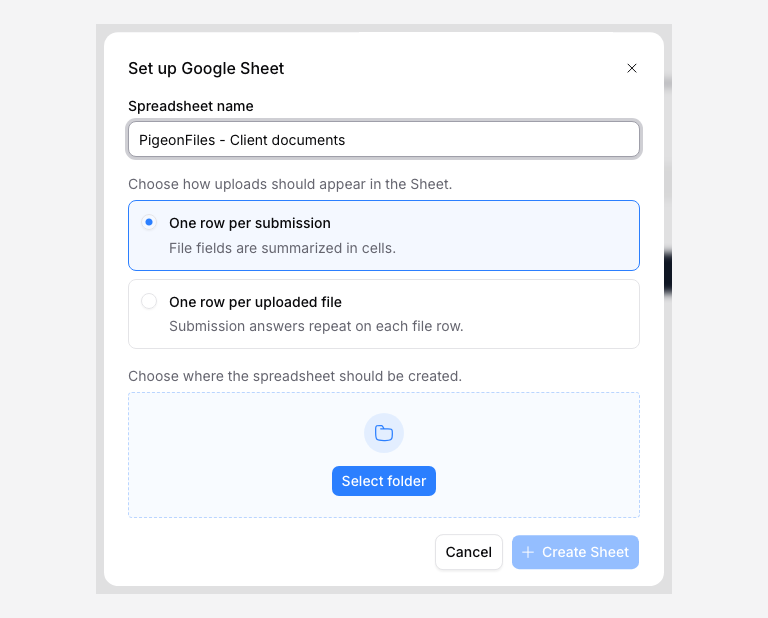
6. Name the spreadsheet
Give the spreadsheet a descriptive name, something like "Client Uploads - [Upload Page Name]" so your team can find it later.
7. Choose the row mode
- One row per submission works well when you want to track intake events. Each row represents one upload, and file details are summarized in the row.
- One row per file works well when you need a file-level checklist. Each uploaded file gets its own row, with the submission answers repeated.
Pick the mode that matches how your team will use the spreadsheet.
8. Choose the spreadsheet folder
Select where in your Google Drive the spreadsheet should live.
9. Backfill existing submissions
If the upload page already has submissions, the backfill option adds them to the spreadsheet. This is useful when you are setting up Sheets on a page that has been collecting files for a while.
10. Submit a test upload and check the row
Upload a test file through the page and verify that a row appears in the spreadsheet with the expected data. Check that field values, timestamps, file links, and delivery status are all present.
Tips
- Use a select field for document type instead of a text field. This keeps values consistent across rows and makes filtering reliable.
- Freeze the header row and add filters so your team can sort by client, date, or document type.
- Share the spreadsheet with team members who need visibility into the intake log.
Related pages
- Send submissions to Google Sheets for the full setup guide.
- Automations and integrations.
- Review and export submissions.
- Start from a template.
Frequently asked questions
Does Google Sheets store the uploaded files?
No. Sheets logs submission data, field answers, timestamps, file links, and delivery status. The actual files go to your connected storage (Google Drive, Dropbox, or OneDrive).
What is the difference between submission mode and file mode?
Submission mode creates one row per submission with file details summarized. File mode creates one row per uploaded file with the submission answers repeated on each row.
Can I add existing submissions to a new Sheet?
Yes. The backfill option adds existing submissions to the spreadsheet when you first connect it.