Create an upload page for a specific request, such as “Send your onboarding documents.” Your uploader opens its public link, answers your questions, and sends files to the storage destination you choose.
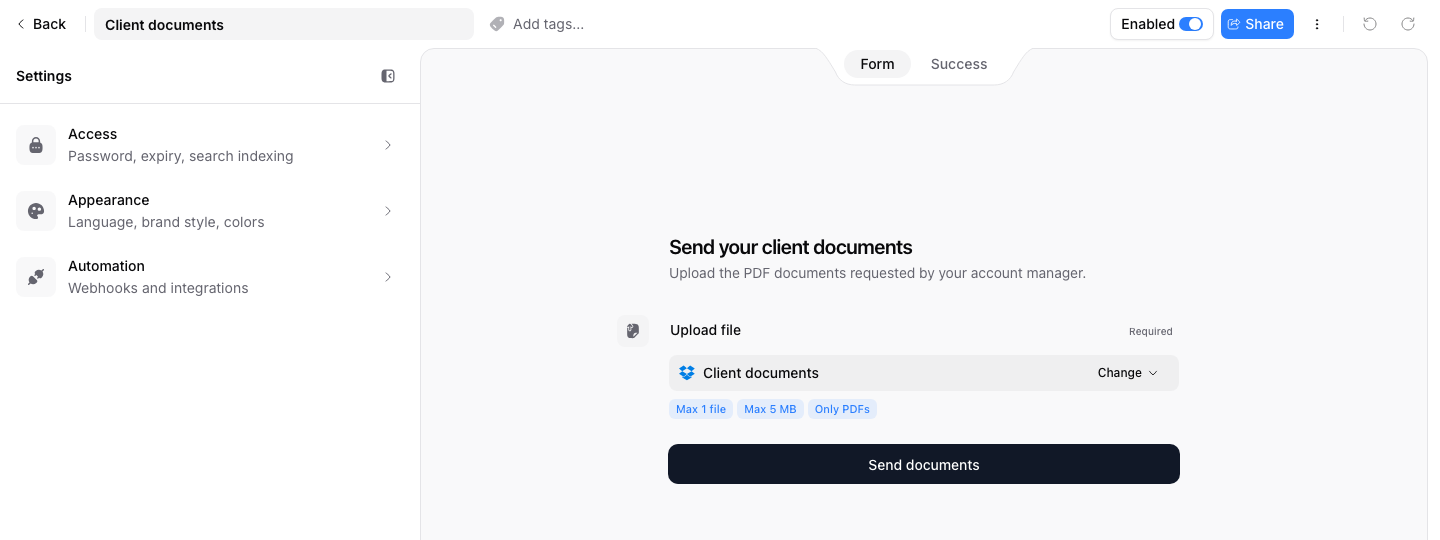
Build the request
- Open Upload Pages > New upload page. Start from a template or configure your own request.
- Set the internal name for your team. Set the public title and instructions for the uploader. Explain what to send, any deadline, and what happens next.
- Add questions with Add item. Use Uploader details for the sender’s identity; enable email if you need it. Add a client reference or document category where useful.
- Add a File upload field for files. Set its required status, accepted types, maximum size, and file count.
- On that file field, choose a storage account and destination folder. Connect Google Drive, Dropbox, or OneDrive if needed. Each file field needs a valid destination.
- Configure folder organization on a supporting plan if answers should name subfolders or files.
- Review Appearance, Access, and the Success content. Add a page password or expiration if your request needs one and your plan supports it.
A page can collect answers without files. You only need storage when you collect files.
Check the uploader’s experience
Choose Preview. Check the title, instructions, required questions, accepted file types, and success message. Try each branch of any conditional questions.
Preview checks the form. To prove delivery, you must submit a small sample through its public link and inspect the result.
Enable and share
Click Save changes, then use Disabled to enable the page. You can also open Share and confirm Enable and share. Resolve any validation messages first.
Copy the Direct link from Share. Send that link to uploaders, or use the embed options for your website. An editor URL opens the workspace and asks for sign-in.

On an enabled page, Save changes updates the live configuration. Disable the page before preparing edits you want to keep closed to new submissions. Read page availability for expiry, plan blocks, and archiving.
Verify a sample
Open the public link, answer the questions, attach a small file, and submit. Check:
- The uploader sees the completion outcome.
- The file appears in the chosen cloud folder.
- Received shows the expected answers and delivery status.
- Any configured Sheet, team email, or external workflow receives the expected output.
If enabling fails, review the highlighted field labels, choices, destination, password, and plan requirements. If the upload fails, check storage health before asking for another copy.
Next: add questions and file requirements, customize the page, or share links and QR codes.